Learn how to propagate rubber plant in water and multiply this robust beauty without soiling your hands in the dirt!

This propagation technique uses water instead of soil to coax your rubber plant into sprouting brand-new babies. It’s practically free therapy for your plant addiction. So, let’s get started.
How To Propagate Rubber Plant In Water?
Step #1: Grab A Healthy Parent Plant
The first and most vital step in the entire propagation process of a rubber tree is, of course, to select a healthy, mature specimen that has robust growth and no signs of pest or disease infestation. You must also ensure that your parent plant is well-hydrated before you start the propagation process. A healthy specimen is important as it will increase your chances of success in water propagation, encouraging robust new leaves quickly.
Plus, having a healthy specimen ensures that the cutting is a hardy one that can survive and thrive even if things go a little south further on in the propagation process.
Step #2: Take Out A Section

The first thing you should do is acquire a pair of nice, sharp pruners to make the cutting. You can also use a sharp knife for this step. Wipe down your tools with isopropyl alcohol to clean and sterilize them before making the cutting. After selecting a healthy stem to cut, use your sharp and sterilized pruning shears to cut at a 45-degree angle just below a leaf. Having sharp, clean tools is essential for this step as it will make propagation easier. Plus, it gives your cutting more surface area to take root.
Ensure that the cutting is at least six inches long and has several leaves. Right after making the cut, the cutting will start dripping sticky, white sap. Put it on tissue paper or a paper towel to air dry until the dripping stops. You should also put on gloves for this process, as the sap getting on your skin can cause irritation. Wash with soap and water if it does get on your skin.
Once the dripping stops, remove the leaves towards the bottom of the stem, cutting gently, leaving only a couple at the top. This helps the plant focus its energy on rerooting. You could also start rolling up one or two leaves that you left on the stem into cylindrical shapes, with the waxy side facing out, and securing them with a rubber band. This helps to prevent the plants’ moisture loss.
You should only work with stem cuttings, as leaves that do not have a part of a branch or stem attached will grow roots but will not grow into a plant. You would thus need to include a leaf node in your stem cuttings to get a plant out of it. The area where the leaf and petiole grow out of a branch is called the node.
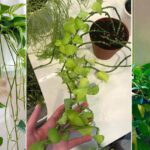
Step #3: Place In Water

For this step, you would need a jar or glass container. Fill it with enough water so that when you put your cutting in the jar, the nodes are submerged, but the leaves are out of the water. For a longer cutting, only having a couple of inches underwater would work fine.
Then, place the glass container or jar in a location where it will get plenty of bright, indirect sunlight. Even some direct sunlight is fine as long as it is the morning sun. Do not place the jar in a dark location, as that will reduce your chances of propagation success and even delay the rooting process.
Remember to replace the water every week, especially if it gets dirty. Not doing so is a fatal water propagation mistake for rubber plants. It might take about 3-4 weeks to start seeing roots forming. Remember that the roots might look a little different than what you are used to.
Step #4: Wait For The Root Appearance

Sometimes, you might see branches forming before the roots. This is completely normal, so don’t worry if you notice the same thing. As mentioned in the last point, the new roots that you start seeing might be slightly different from the ones you are used to. This means that the new roots will resemble irregular, white stubs, and you might even mistake them for mealybugs!
But as you start waiting for them to grow out, you will see them turning into the appearance of normal roots. Once these roots are about 1 or 2 inches long, you can repot the cutting into the soil.
Step #5: Repot Into Soil

This step is completely optional, as you can grow your rubber plant quite well in the water itself. If you continue to grow it in water, just shift your plant to a larger container. If you want to repot the cutting in soil, follow the steps below.
First, choose a moist, well-draining soil mix to plant your cutting and an ideal pot size for it. Choosing the right-sized plant pot is especially important because it will help you avoid transplanting your plant too soon. Before you plant in your cutting with roots, you can apply a little rooting hormone to the end of it.
A warm, sunny location would be ideal to plant your rubber tree. Having a moist medium is also crucial, as the humid environment allows the plant to sprout roots. Though best grown in a greenhouse, an alternative would be to put a clear plastic bag over the rubber plant and mist the inside occasionally for the best humidity levels. Once you see the plant cutting having a developed root system, you can remove the plastic covering. You will also start to see small reddish branches forming, sometimes under the soil line, which is completely normal.
As your plant becomes more established and root-bound, you can consider shifting it to a larger pot. But make sure to acclimatize it properly. In terms of watering, you must allow the soil to dry out between waterings, but not completely, as that will mess with the rooting process and the healthy development of the plant.
Rubber Plant Care In Water
- First and foremost, remember to change out the water in the container weekly, especially if it has turned dirty or cloudy. In between, you can just top off the water level. Do not let it evaporate or dry out completely.
- Though the mature rubber tree can thrive in bright sunlight, it must still be dappled or indirect. So, of course, you should place the young plant cutting in a location that does not get intense sunlight at all as that may scorch and burn the leaves. What you can do is place the cutting in its container near a window with a sheer curtain to filter out the light and promote healthy growth. This care will help your rubber tree thrive.
- Ensure that the soil mix you later repot the cutting in is consistently moist for appropriate humidity levels. On the other hand, ensure that the soil is not waterlogged or soggy, as that would cause root rot. Any sudden fluctuations in humidity levels can affect the cutting’s overall health and growth.